12 February 2021

To reduce energy costs, enhance the value of your property, or boost your home’s aesthetic appeal, investing in a new garage door is an excellent choice. Before embarking on this endeavor, it’s crucial to acquaint yourself with essential factors to consider. We invite you to read our detailed guide on How to pick the right garage door.
When considering any significant purchase, clarity about your specifications is paramount. For garage doors, accurate measurements are foundational. It’s not only about gauging the height and width of the rough opening; detailed dimensions are vital. Incorrect measurements can not only escalate installation costs but may even render the installation unfeasible.
At Garex, our aim is to guide you smoothly through this process. We present a concise guide of five steps to accurately measure your garage door. By adhering to these guidelines, you will be equipped with the essential data from the outset. Shall we get started?
A FEW THINGS TO KNOW BEFORE YOU BEGIN
When measuring a garage door, adhering to certain guidelines is crucial to achieve accurate results. Consider the following best practices before you initiate the process:
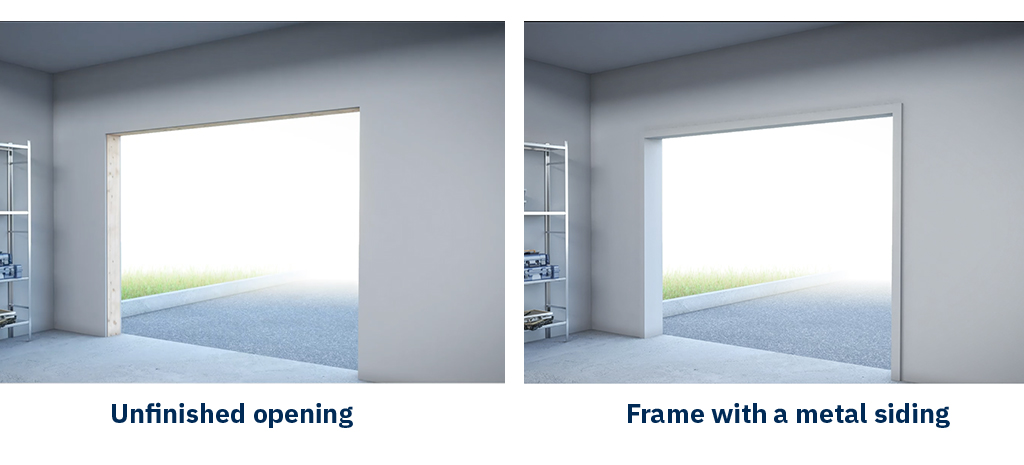
- Always measure the finished rough opening of the door, which includes the frame and metal siding. Do not base measurements on the old door.
- Obtain the width and height dimensions at their longest points for accuracy.
Additionally, it’s essential to identify any equipment or installations in close proximity to the garage door. Their presence might influence the choice of opening mechanism necessary to ensure the door operates efficiently. This can include items like ceiling heaters, central vacuum systems, water heaters, or electrical panels, among others. Please communicate the details of these nearby installations to your garage door installer.
It’s equally important to inform the installer of any atypical wall structures or features, such as ceiling storage brackets or mezzanines, before their visit. No matter the spatial constraints for the opening mechanism, Garex is committed to customizing a system that optimally fits your specific environment.
In conclusion, should your garage feature multiple doors, we emphatically advise measuring each opening individually. While rough openings may appear identical upon initial observation, subtle discrepancies often exist, which can impact their respective weatherproofing capabilities.
TAKE THE MEASUREMENTS OF YOUR GARAGE
Begin by ensuring your garage door is fully open prior to taking measurements. For optimal accuracy, it’s advisable to enlist assistance during this process. Equip yourself with a tape measure and have paper and a pencil ready, or utilize any preferred tools you typically employ for measurement and notation.
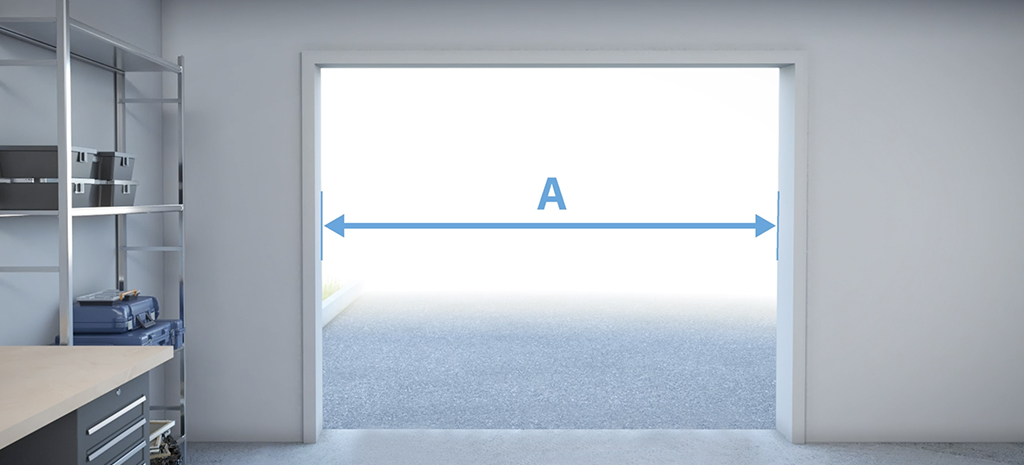
1. Measure the exact width of the opening
As previously mentioned, measure the width of the opening from the frame or metal cap, making sure to take the measurements at the widest part of the opening.
Write down the exact number of feet and inches shown on the tape measure.
2. Measure the exact height of the opening.
Determine the ceiling clearance by measuring from the floor up to the lowest obstruction on the ceiling, whether that be joists, lighting fixtures, or other structural components.
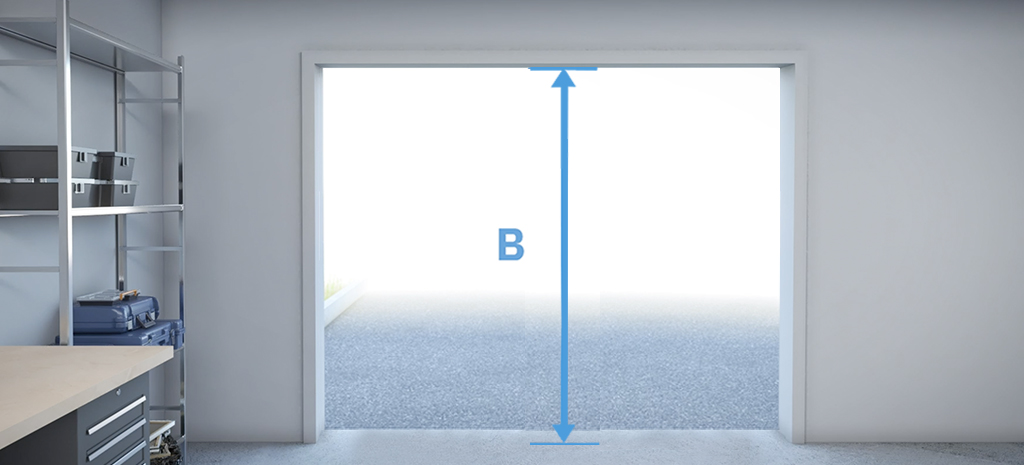
Inside your garage, measure the clearance between the side of each opening and the cross wall or, if you have multiple doors side by side, between door openings. Each side of the opening should have a clearance of at least 4″ for a 2″ track, and 6″ for a 3″ track
3. Measure the distance from floor to ceiling, and the headroom
Measure the ceiling clearance from the floor to the lowest point of the ceiling, or to the joists, fluorescents or other structural elements on the ceiling.
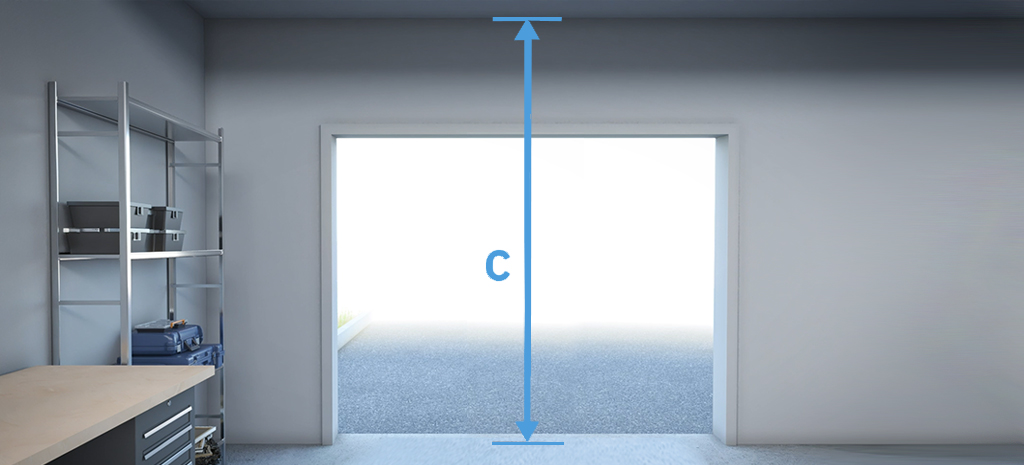
Then, obtain the headroom by measuring the space between the top frame of the door opening and the lowest part of the ceiling, joist, or fluorescents.
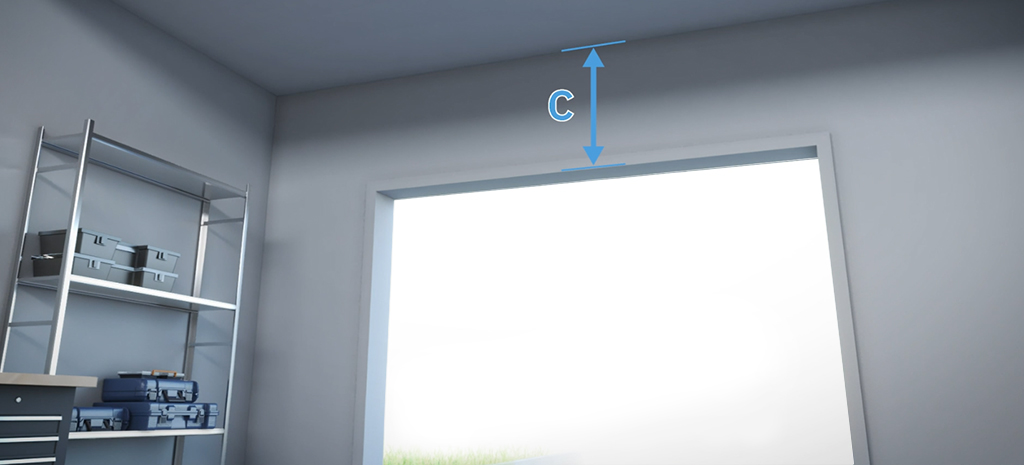
If you want to have a garage door opener installed, you will need a minimum headroom of 12”.
4. Measure the side room on either side of the opening.
Inside your garage, measure the clearance between the side of each opening and the cross wall or, if you have multiple doors side by side, between door openings. Each side of the opening should have a clearance of at least 4″ for a 2″ track, and 6″ for a 3″ track.
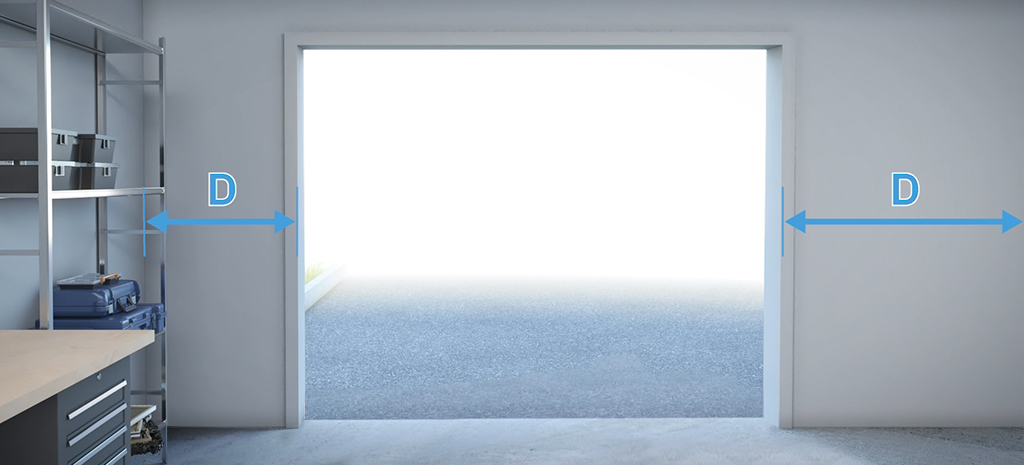
If there is a column or any other type of obstacle between two rough openings, measure the distance from the opening of each door to the obstacle.
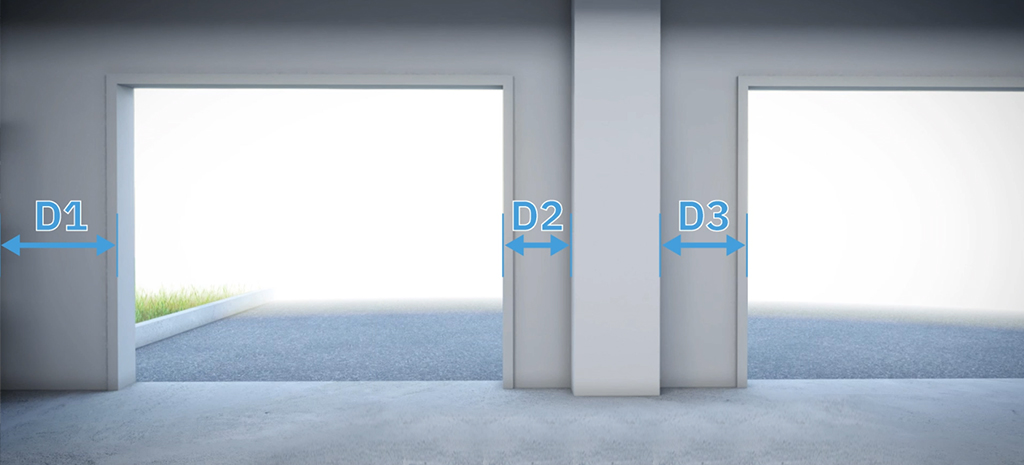
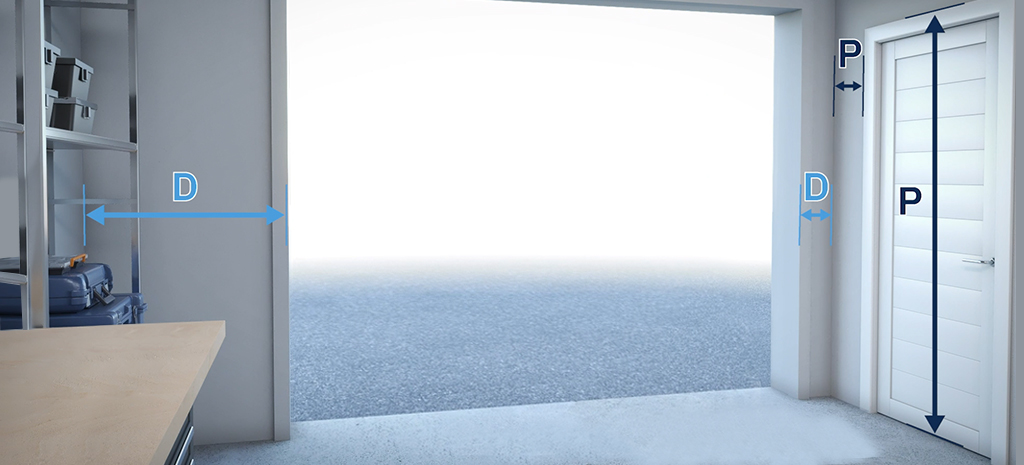
If there is an access door next to your garage door, measure the height of the access door as well as the distance between the rough opening and the wall of the access door.
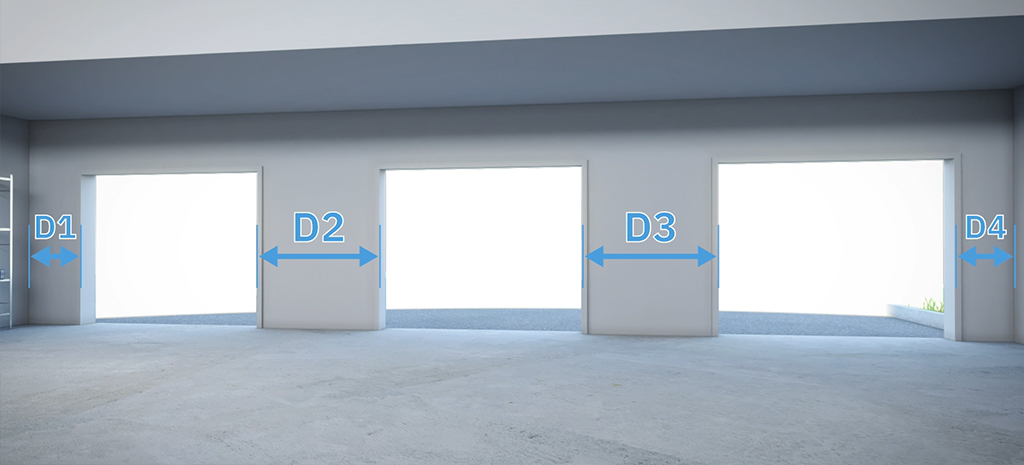
If your garage has multiple garage door openings side by side, measure the distance between the doors and the distance on each side to the left and right walls.
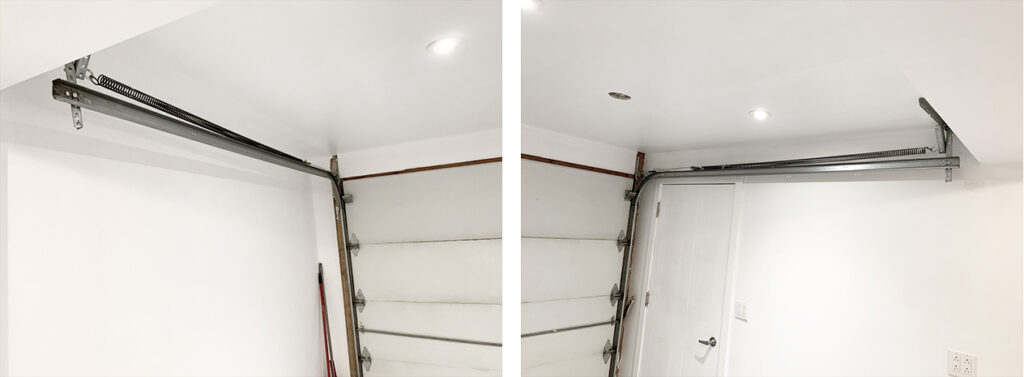
Clearances that are too narrow, like in these photos, will make installing your new garage door much more complex. It is important to take these side measurements properly and speak to a Garex expert before ordering your new door. The latter will be able to advise you or find viable solutions before you make an investment.
5. Measure the backroom.
Measure the unobstructed depth of your garage ceiling. The goal is to find out what the available space for installing of the tracks is.
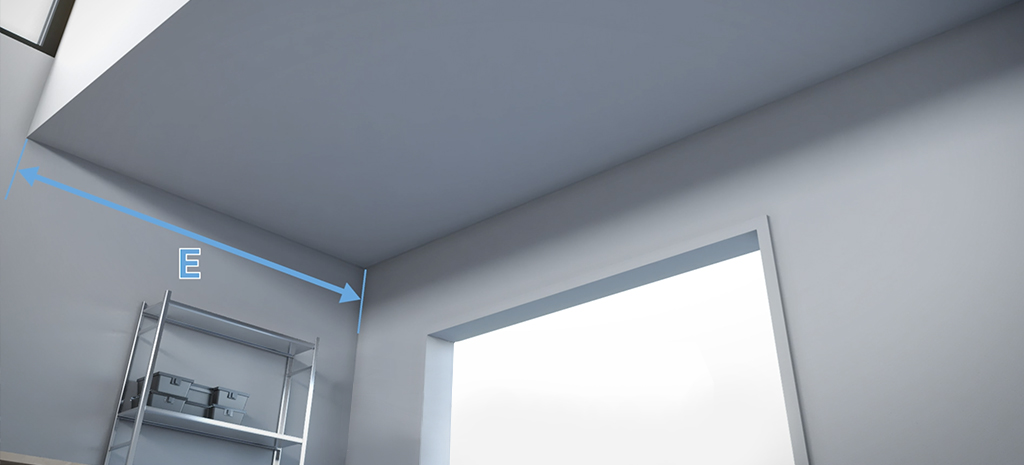
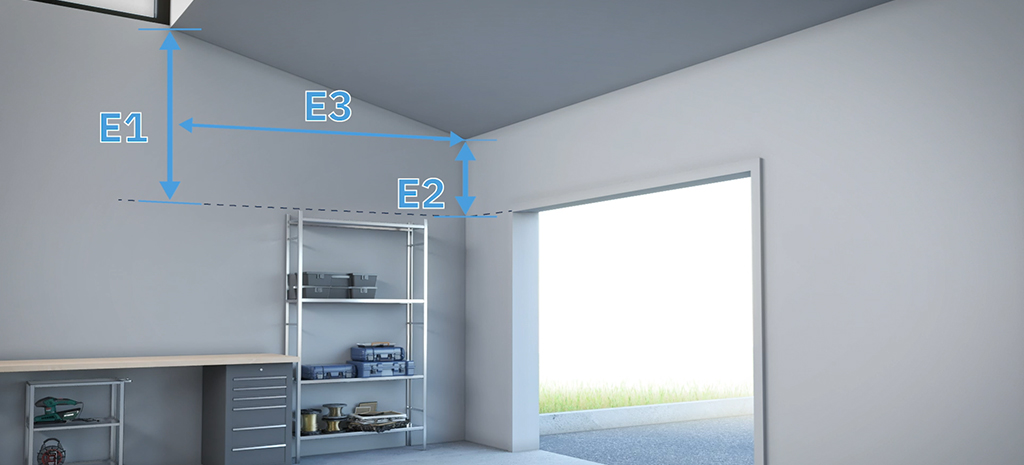
If your garage has a sloping ceiling, you will have to find the degree of the slope. To do this, establish a horizontal reference point and base your calculations on the height differences from that line. First, measure the distance from the reference line to the ceiling at the location that is the closest to the rough opening, and then between the reference line and the highest point of the ceiling slope. Be sure to take these measurements on the unobstructed depth of your garage ceiling. These measurements will allow you to calculate the degree of slope of the ceiling.
Repeat all the steps for each rough opening, if you have multiple doors.
MORE USEFUL INFORMATION FOR YOUR INSTALLER
In addition to giving the measurements you have just taken to your garage door installer, a few more things should be provided to them before your installation date.
Tell them what type of material they will be installing the track on: wood, steel or concrete.
Also, let them know if you have a support for the spring.
With all this information in hand, your installer will be able to give you a precise estimate as well as prepare the adequate equipment for a smooth installation.
IN DOUBT, TRUST A GAREX EXPERT
Now that you have taken all your measurements, we invite you to visit the Garex website for inspiration. You will not only find a wide choice of garage door models for all tastes and budgets, but will also see our customization options for patterns, windows, materials, decorative hardware, colors, and much more. You can even request a free online quote!
Of course, our experts are always available to answer all your questions and to guide you to reputable installers near you.
Visit garexdoors.com now!

